

How to Install PVC Foam Board on a Wall: Adhesives, Fixings and Expansion Gaps
Introduction
PVC foam board can create a clean, moisture-resistant wall finish, but a good-looking result depends on what happens behind the sheet. The wall must be sufficiently flat and sound, the fixing method must suit the substrate and service conditions, and the boards must be able to move as temperature changes.
This guide explains the three decisions that matter most: wall flatness, fixing method and expansion allowance.
Important: This is a general guide for interior wall lining. Always follow the current board, adhesive and fixing manufacturers’ instructions. Complete a compatibility and adhesion trial before the main installation.
Quick Answer
|
Question |
Practical Answer |
|
How flat? |
Flat, plumb, sound, clean and dry. Use no more than 3 mm deviation under a 2 m straightedge as a practical project target, unless the system supplier requires tighter. |
|
Which fixing? |
Spot/dab bonding for limited light-duty work on a basically flat wall; full-spread bonding for continuous support; mechanical fixing to sound framing or battens for difficult substrates or positive restraint. |
|
How much gap? |
As a practical starting point: 2–3 mm between boards and 3–5 mm at perimeters and fixed penetrations. Increase it for long runs or wider temperature swings. |
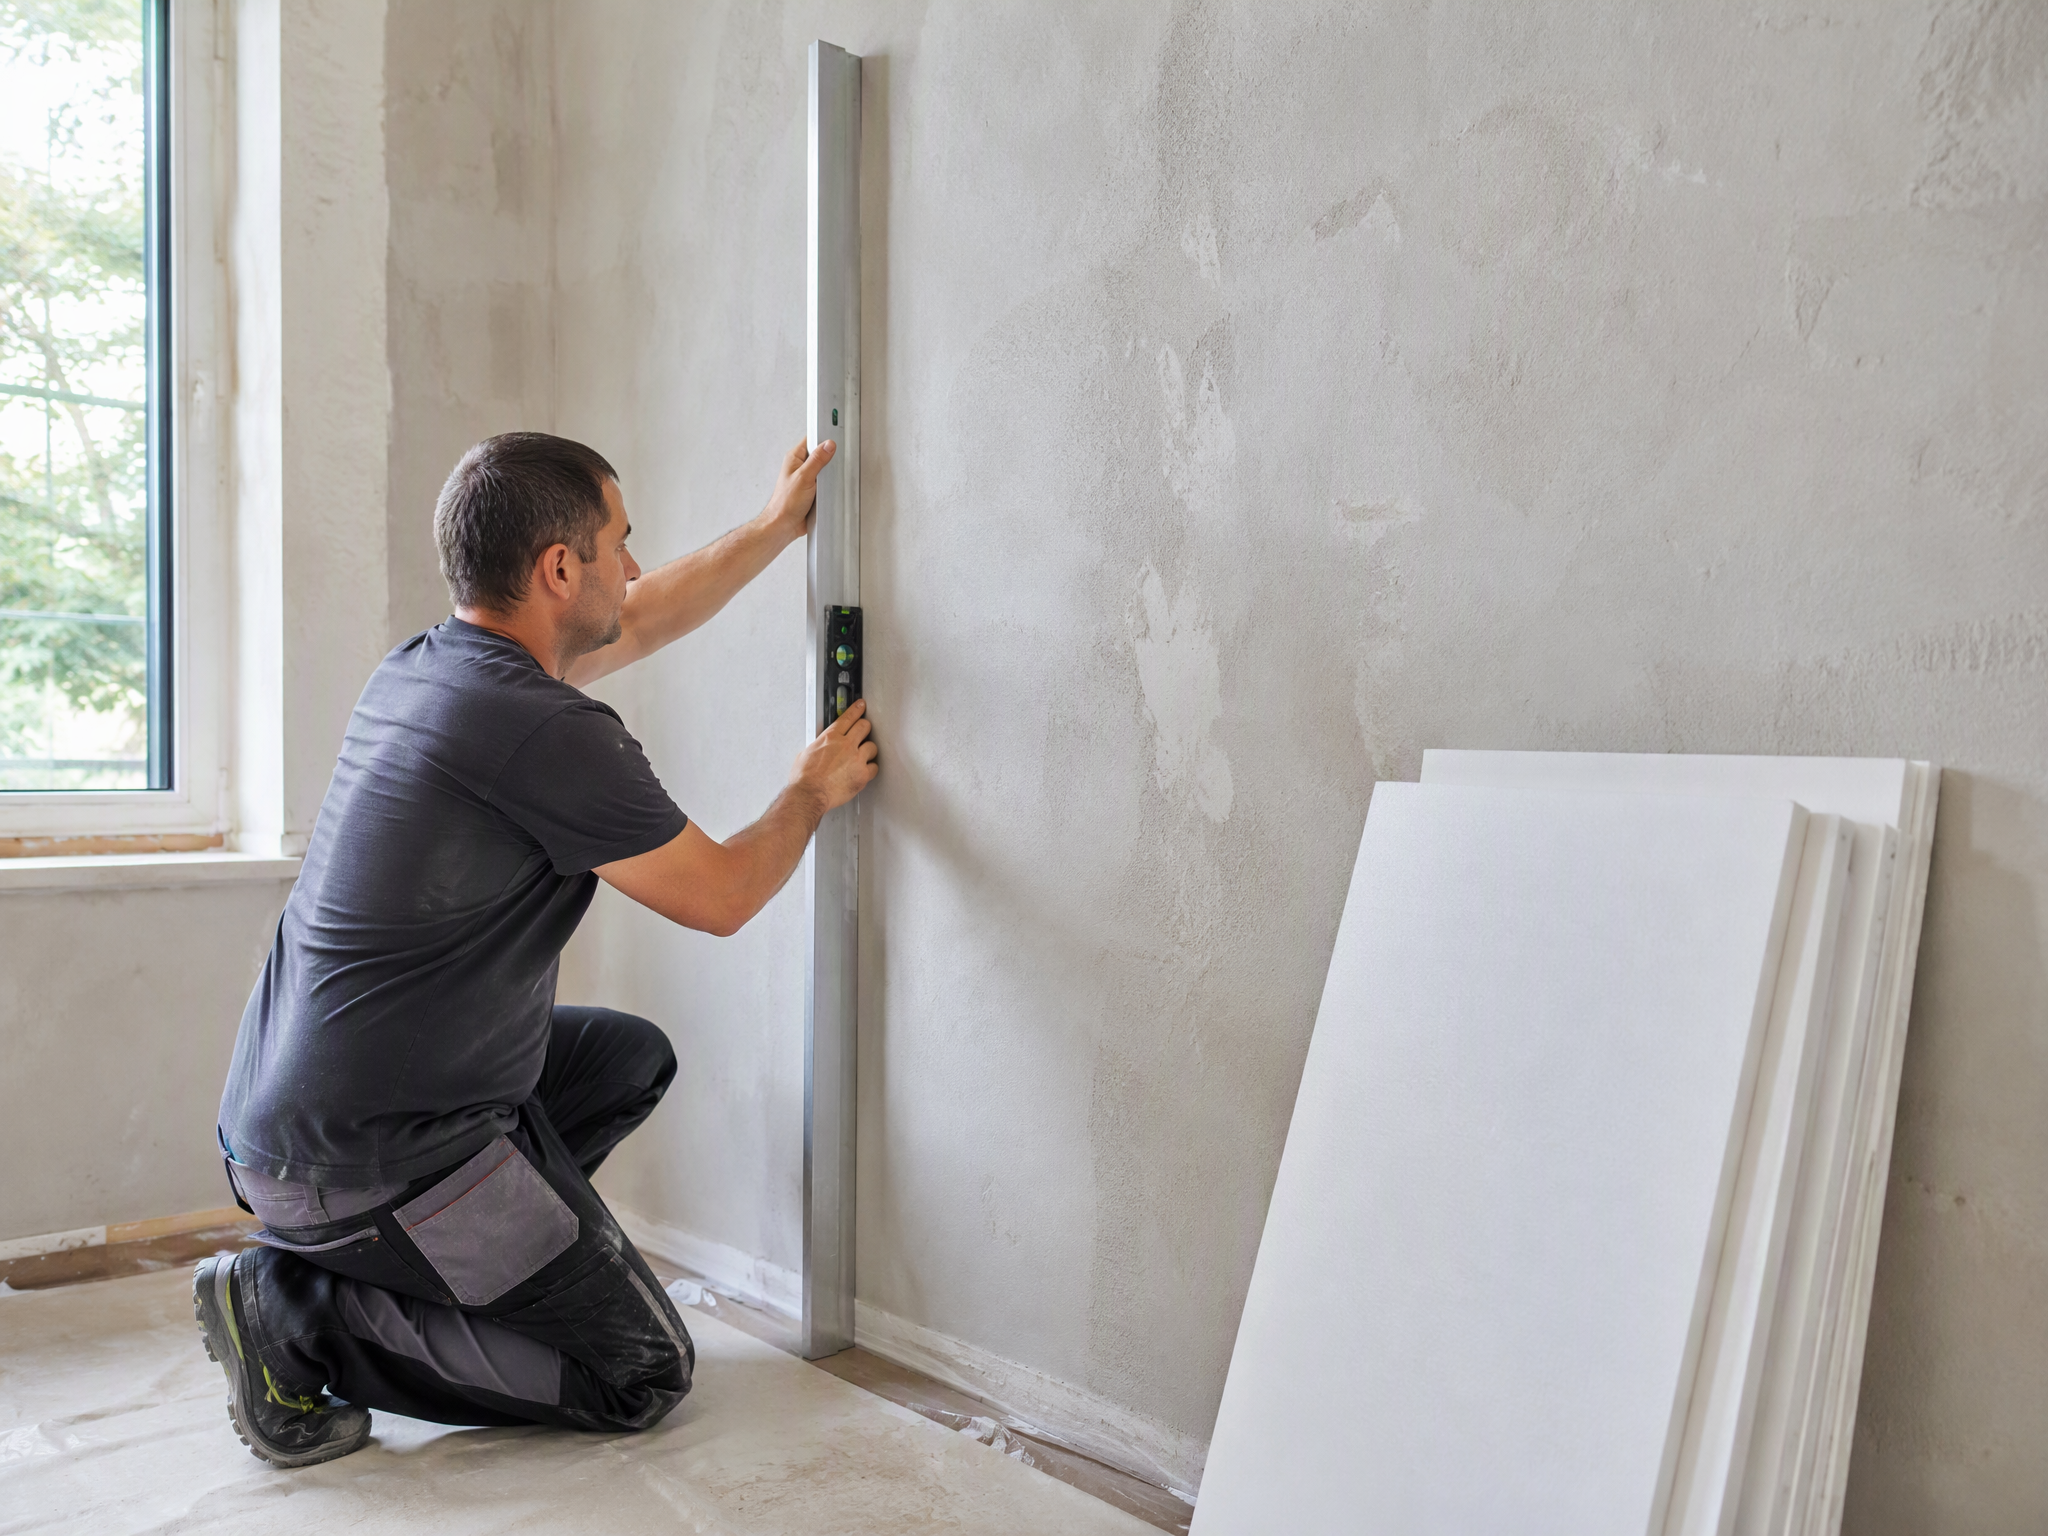
Figure 1. Check the wall with a long straightedge and level before choosing the fixing method.
1. Check the Wall Substrate Before Installation
A PVC foam board follows the plane of the surface behind it. Adhesive can bond a board to a wall, but it should not be treated as a levelling compound for major hollows or bows. An uneven substrate can cause oil-canning, visible joints, spring-back, hollow areas or local adhesive failure.
Flatness requirement
Use a 2 m straightedge and check vertically, horizontally and diagonally. A practical acceptance target is:
Maximum deviation: 3 mm under a 2 m straightedge.
No abrupt ridges, proud screw heads or isolated hollows beneath board edges.
Corners and board-joint lines should be straight, plumb and properly supported.
The 3 mm/2 m figure is a practical project tolerance rather than a universal PVC foam-board standard. If the board or adhesive manufacturer specifies a tighter tolerance, use the tighter value.
The wall must also be sound, clean and dry
Sound: remove loose plaster, flaking paint, weak skim coat and friable material.
Clean: remove dust, grease, oil, wax, soap residue and construction debris.
Dry: correct leaks, rising damp or trapped moisture before covering the wall.
Stable: repair movement cracks and unstable backgrounds before installation.
Compatible: confirm the primer, adhesive, sealant and board surface work together.
How to correct an uneven wall
Grind or sand isolated high spots.
Fill low areas with a suitable repair or levelling compound and allow it to cure.
Replace or refix loose lining boards.
For a badly bowed, damp or unreliable wall, install a level framework or treated battens instead of using thick adhesive dabs.
2. Choose the Right Fixing Method
Option A: Spot or Dab Bonding
Compatible adhesive is applied in controlled dabs or beads. Use this only when the wall is already flat and stable, the work is interior and light duty, and the adhesive manufacturer permits bead or dab application for both materials.
Advantages: faster application and lower adhesive use.
Limitations: unsupported zones can cause hollowness, local print-through, spring-back and impact vulnerability.
Do not use oversized adhesive blobs to correct a seriously uneven wall.
Option B: Full-Spread Bonding
Adhesive is distributed evenly over the prepared wall with the method specified by its manufacturer. Press or roll the board from the centre outward to remove trapped air.
Choose it for a consistently flat face, large or thin sheets, hygienic or wash-down areas, and projects requiring continuous support.
It uses more adhesive and requires careful wall preparation, coverage, open time and rolling pressure.
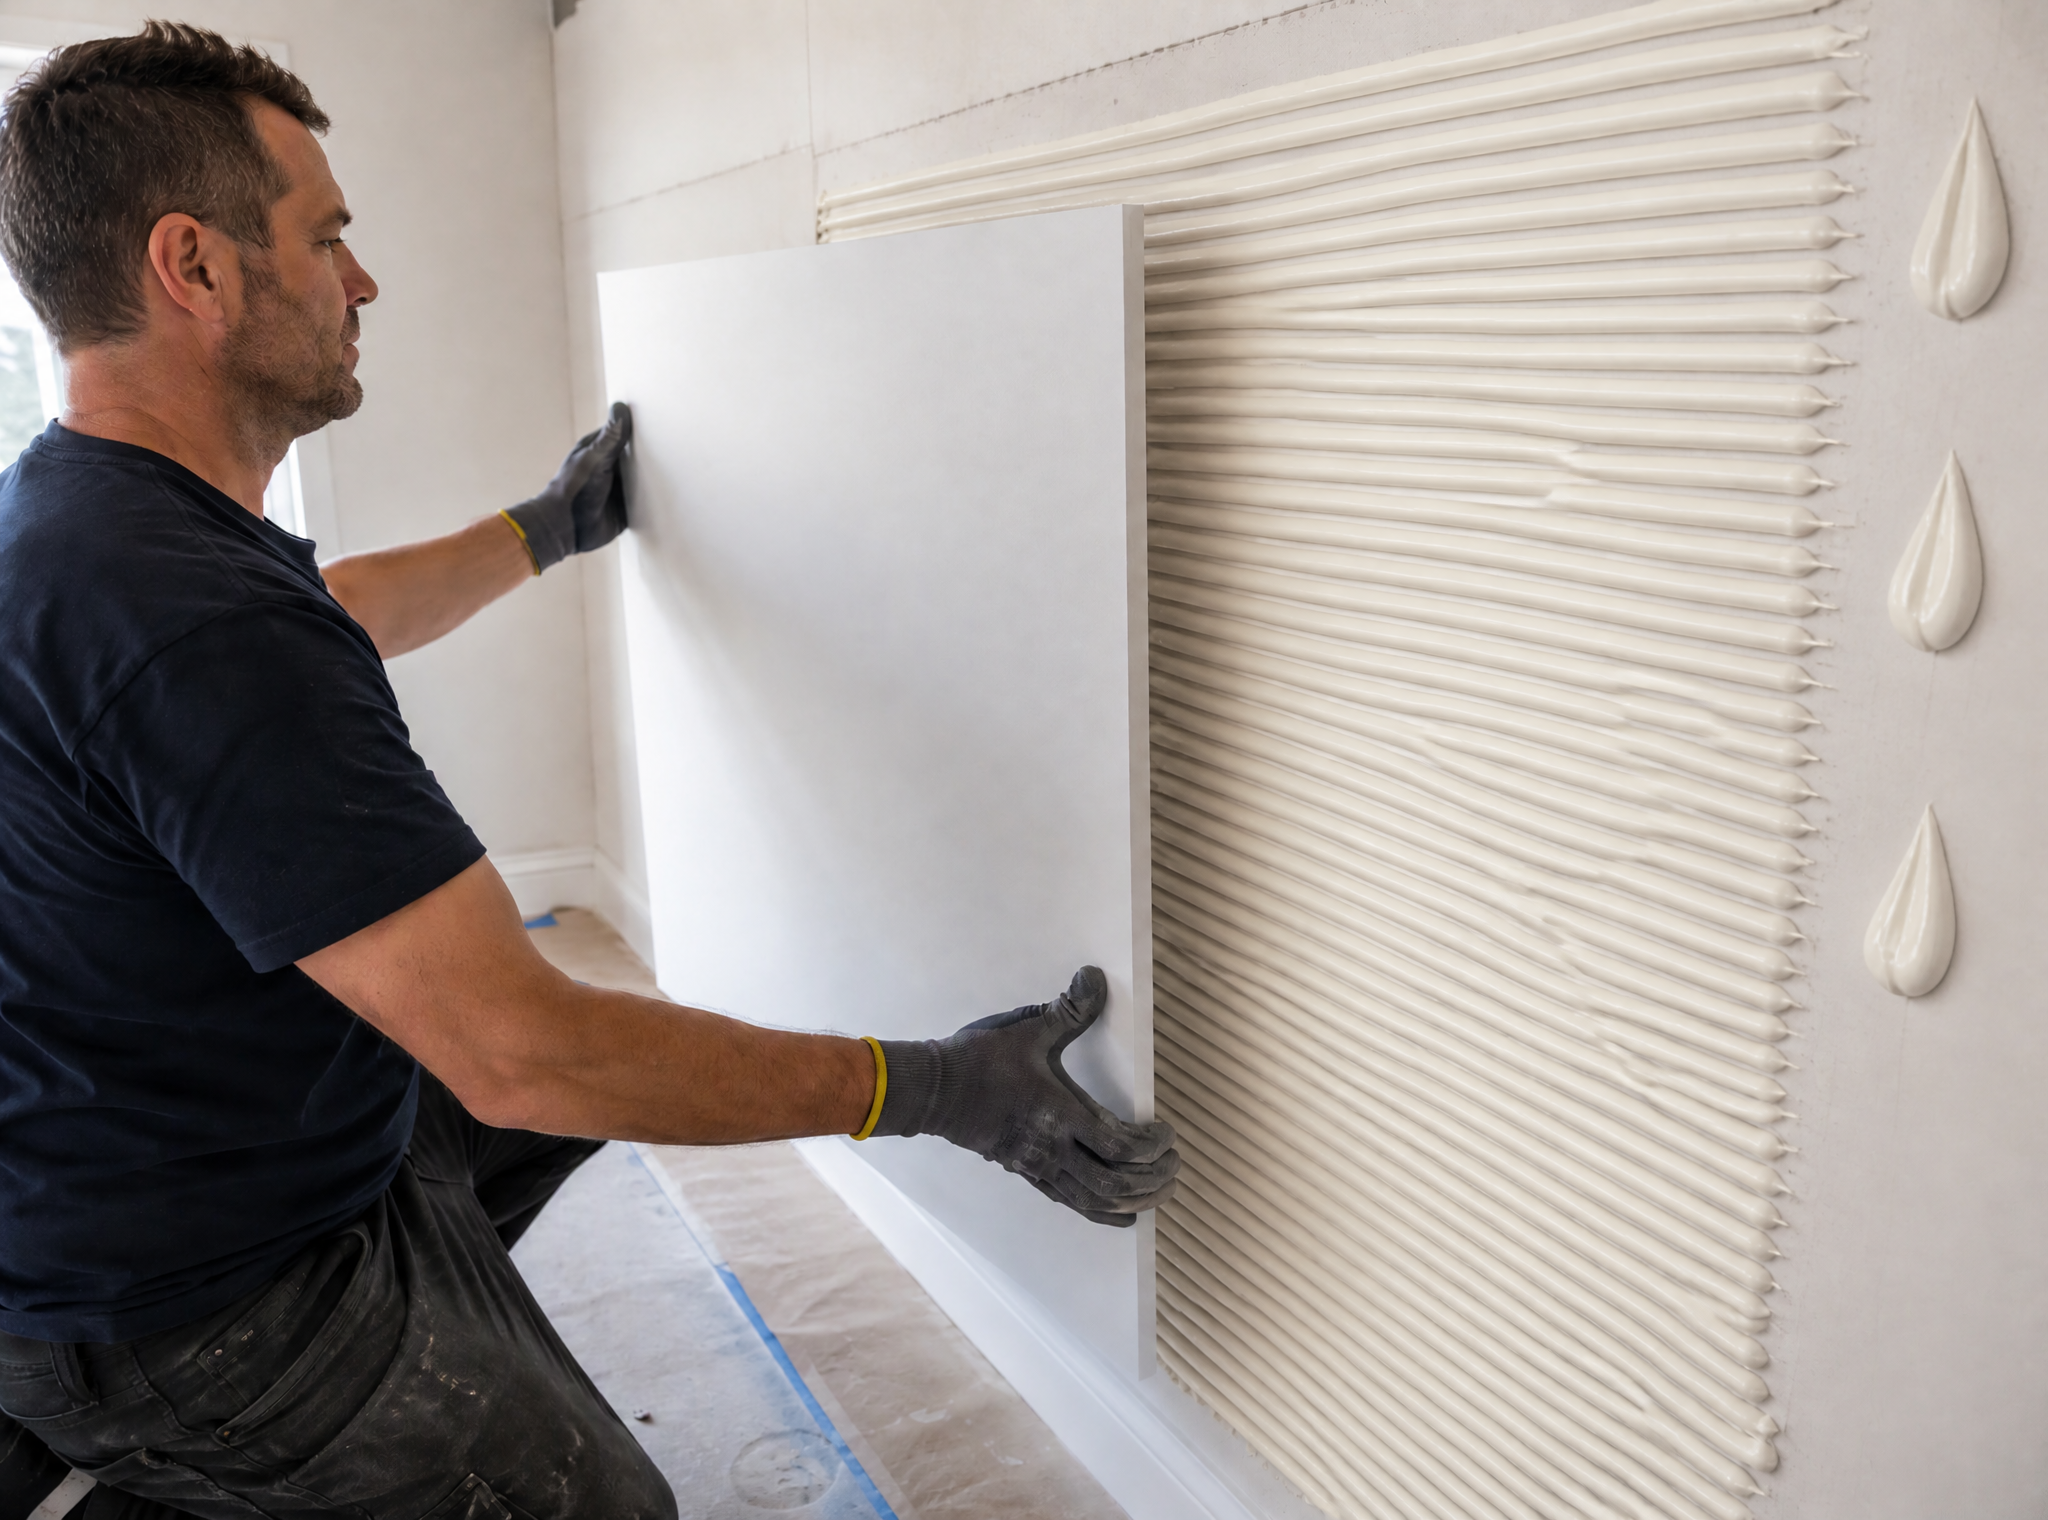
Figure 2. Full-spread bonding gives continuous support when the wall is flat, clean, dry and compatible with the adhesive.
Option C: Mechanical Fixing
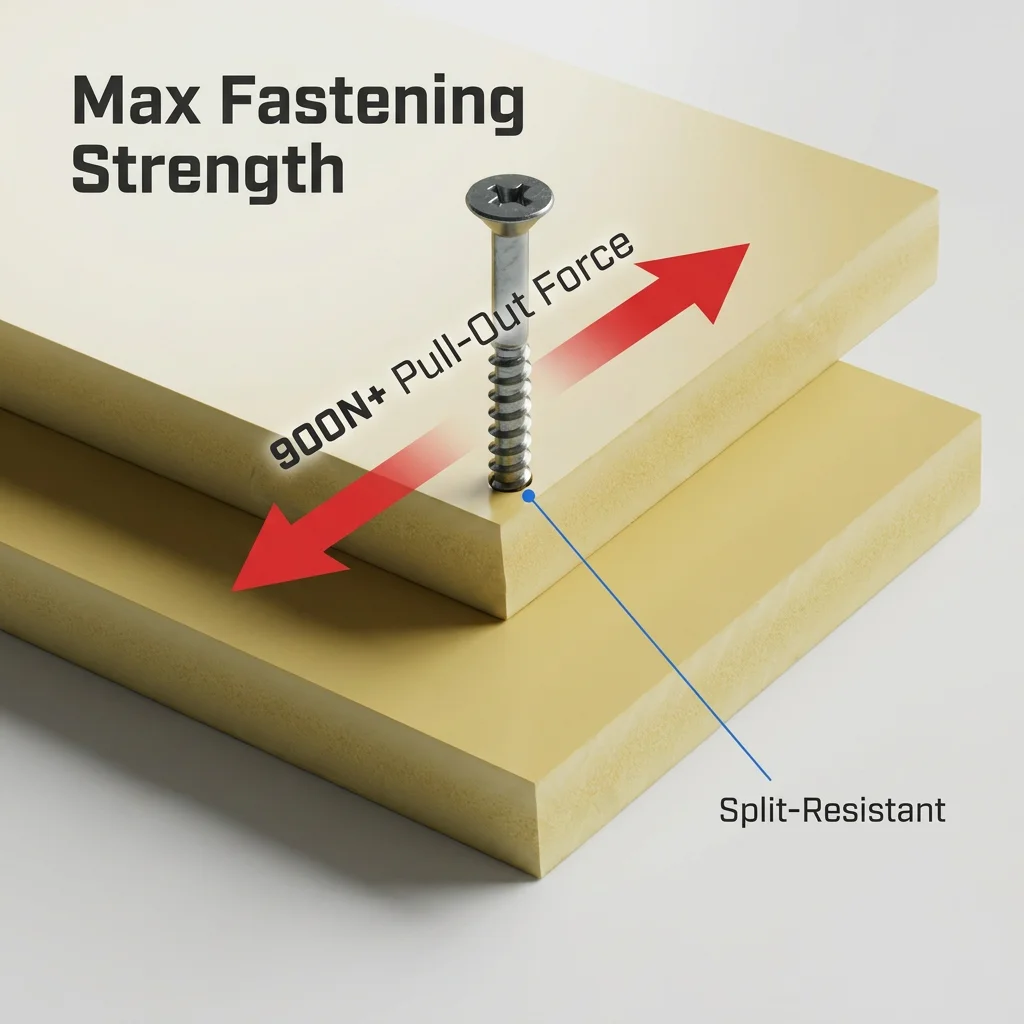
Secure the board to sound framing, battens or approved anchors with corrosion-resistant fasteners and load-spreading washers or profiles.
Choose it for uneven or unreliable walls, overhead work, impact exposure, removability, significant temperature movement or uncertain adhesive compatibility.
Use clearance holes or slots, centre the fastener, and do not overtighten or dimple the board.
Follow the board supplier’s edge-distance and fixing-spacing schedule; one generic spacing cannot suit every thickness and loading condition.
Option D: Hybrid Fixing
A compatible adhesive may support the sheet while selected fasteners provide positive restraint or temporary support during cure. Use a hybrid system only when its components are designed to work together.
3. Select a Compatible Adhesive
The adhesive technical data sheet should confirm compatibility with both foamed PVC and the actual wall substrate. It must also meet the project’s moisture, temperature, indoor-air and fire requirements.
Consider a compatible flexible panel adhesive, MS-polymer/hybrid adhesive, polyurethane construction adhesive or another system approved by both product manufacturers.
Confirm primer, trowel notch or bead size, coverage, open time and curing conditions.
Carry out a small trial to check bond strength, staining, softening, swelling or distortion.
Do not assume any product labelled “PVC glue” is suitable. Pipe cement and aggressive solvent-rich products can attack or mark some foamed PVC surfaces.
4. Expansion Gaps: How Much and Why?
PVC foam board changes dimension as its temperature changes. One representative foamed PVC sheet data sheet publishes a linear thermal expansion coefficient of about 6.7 × 10⁻⁵ per °C. The exact value varies by product, so use the current technical data for the board being installed.
Movement ≈ board length × expansion coefficient × temperature change.
Example: a 2.44 m board exposed to a 20°C temperature change may move by approximately 3.3 mm. A tight installation can therefore buckle, bow, open joints or stress the adhesive as the room warms.
Practical starting allowance
Between adjacent boards: 2–3 mm.
At walls, floors, ceilings, internal corners and fixed frames: 3–5 mm.
Around pipes, outlets and other fixed penetrations: 3–5 mm.
Increase the allowance for long wall runs, direct sunlight or heat, dark boards, wide seasonal temperature changes, or exterior/semi-exposed work. The supplier’s project-specific calculation takes priority.
Finish movement joints correctly
Hide the gap behind a compatible cover trim.
Use a two-part movement-capable joint profile.
Use compatible flexible sealant where hygiene or water resistance requires sealing.
Do not bridge an intended movement joint with rigid filler, hard paint or a tightly fixed trim.
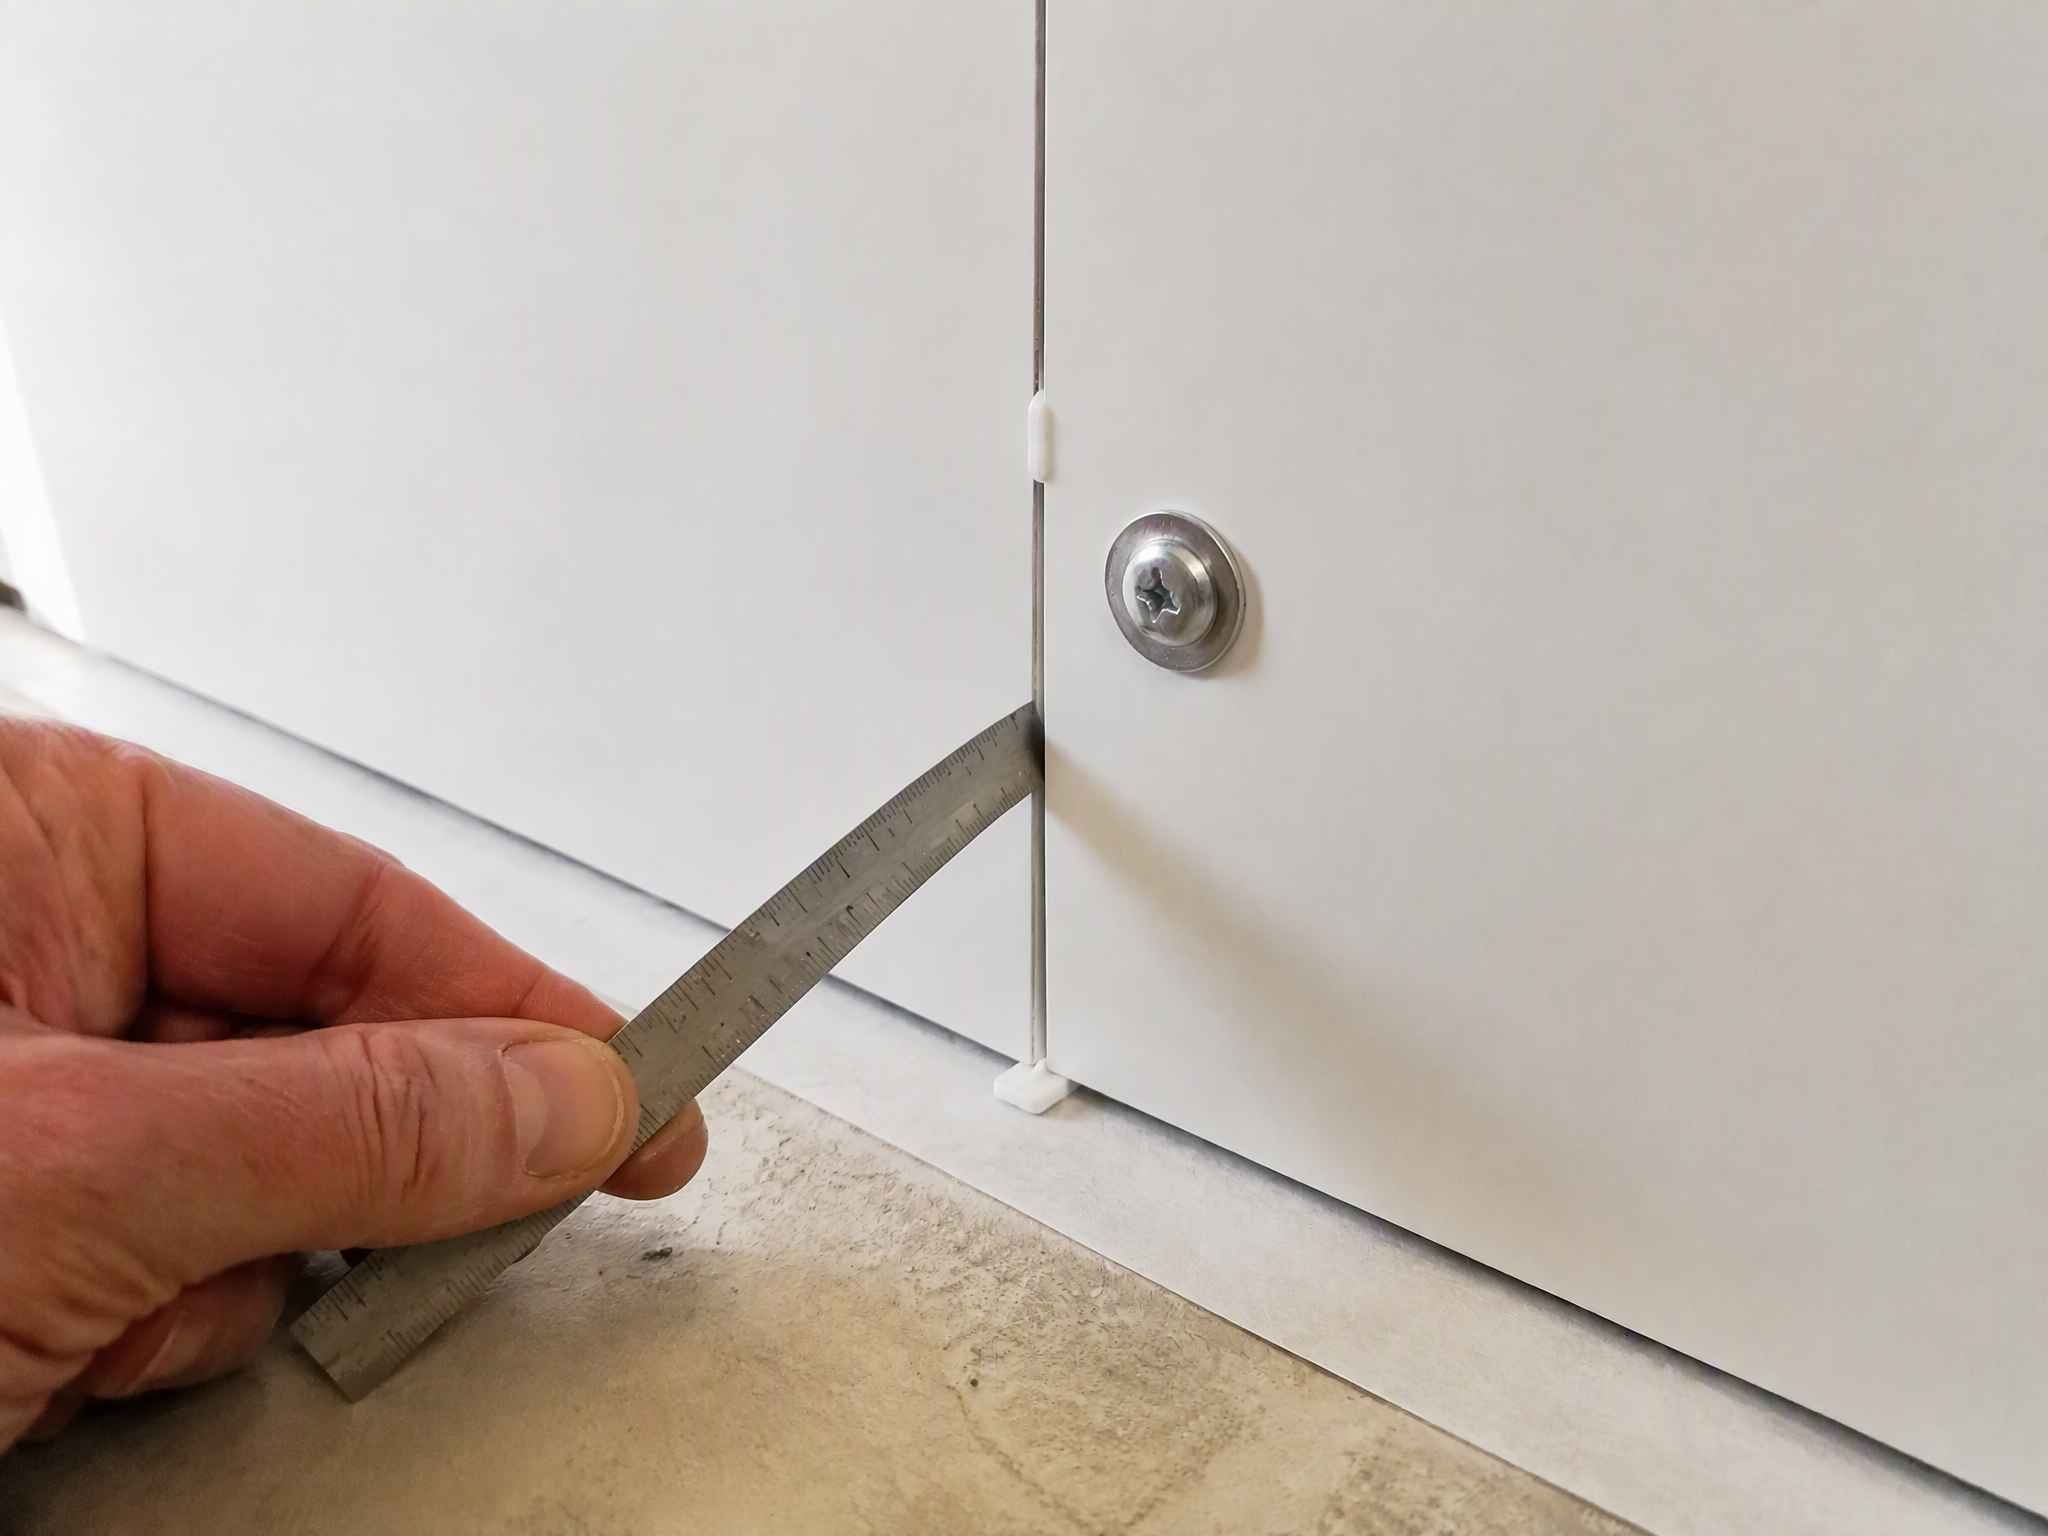
Figure 3. Use removable spacers to maintain the designed joint and avoid overtightening mechanical fixings.
5. Step-by-Step Installation Procedure
Confirm the specification: board grade, thickness, sheet size, environment, adhesive, fasteners, joint profile and relevant fire or hygiene requirements.
Condition and inspect the boards: store flat and dry, allow them to reach installation conditions as directed, and inspect surfaces and edges.
Prepare the wall: check with a long straightedge, repair high and low areas, remove contamination and prime only if required.
Plan the layout: establish a level or plumb datum, minimise narrow strips and identify penetrations and movement joints.
Cut and dry-fit: support the sheet fully, use suitable tools, remove swarf and confirm perimeter clearance.
Apply the selected fixing system: approved spot pattern, full-spread adhesive or movement-friendly mechanical fixing.
Set the board: position it on the datum without closing the perimeter gap and press or roll it evenly.
Maintain expansion space: use removable spacers and recheck the joints after pressing, rolling or fastening.
Complete joints and trims: after the required cure stage, remove spacers and install compatible profiles or flexible sealant.
Inspect: check face flatness, straight joints, uncrushed fixings, retained movement space and clean surfaces.
6. Common Installation Mistakes
Using adhesive to level a badly uneven wall
This leaves unsupported voids and can pull the board out of plane. Repair the substrate or install level battens.
Choosing adhesive by grab strength alone
Initial grab does not prove chemical compatibility, moisture resistance or long-term flexibility. Check the full technical data sheet.
Installing boards tightly edge to edge
A tight fit leaves no room for movement and may cause buckling, joint peaking, cracked sealant or adhesive stress.
Overtightening screws
A screw that clamps the sheet rigidly or dimples its face becomes a stress concentration. Use clearance holes and avoid crushing the surface.
Frequently Asked Questions
Can PVC foam board be glued directly to painted drywall?
Yes, if the paint is well bonded, clean and compatible with the selected adhesive. If the paint film is weak, the adhesive may pull the paint from the wall.
Is spot bonding enough for a full-size sheet?
Only when the wall is basically flat, the service is light duty and the adhesive supplier approves that pattern. Full-spread bonding is generally safer for large or thin sheets requiring a uniformly flat finish.
When are battens better than direct bonding?
Use battens when the wall is too uneven, damp or unreliable, when a ventilated cavity is required, or when positive mechanical fixing is preferred.
Can the expansion gap be filled with hard filler?
No. A movement joint must remain able to move. Use a specified flexible sealant or movement-capable trim.
Conclusion
Prepare a flat, sound, clean and dry substrate; use 3 mm under a 2 m straightedge as a practical target unless the system supplier requires otherwise. Select spot bonding only for limited light-duty work, full-spread adhesive for continuous support, and mechanical fixing or battens for difficult substrates. Finally, leave movement space—typically 2–3 mm between boards and 3–5 mm at perimeters and fixed objects, adjusted for sheet length and temperature range.
Editorial note: The gap ranges and 3 mm/2 m flatness value are practical starting specifications, not universal requirements. Replace them with the project board and adhesive suppliers’ written values whenever available.
Recommended Products

Hot News
-
How to Install PVC Foam Board on a Wall: Adhesives, Fixings and Expansion Gaps
2026-10-30
-
Meet PLUSWIN at the 140th Canton Fair
2026-10-26
-
Importing PVC and WPC Boards from China: Landed Cost, HS Codes and Customs Documents
2026-10-22
-
PVC and WPC Board Fire Ratings Explained: ECE R118, ASTM E84 and EN 13501-1
2026-10-22
-
How to Cut, Drill and Bend PVC Foam Board: A Complete Fabrication Guide
2026-09-24
-
PVC & WPC Foam Board FAQ
2026-09-24
-
PVC Foam Board & WPC Board FAQ: Products, Customization, Quality and Shipping
2026-09-08
-
How to Test the Quality of PVC Foam Board: A Practical Buyer’s Guide
2026-09-08
-
Luxury Without the Price Tag: How PVC Marble Sheets Are Redefining Modern Interior Aesthetics
2026-08-14
-
Discover the rigorous quality control process inside the PLUSWIN factory. Learn how we guarantee consistent thickness, zero formaldehyde, and superior durability in every PVC board batch
2026-07-21